
Hack an IKEA TV cabinet with real wood top

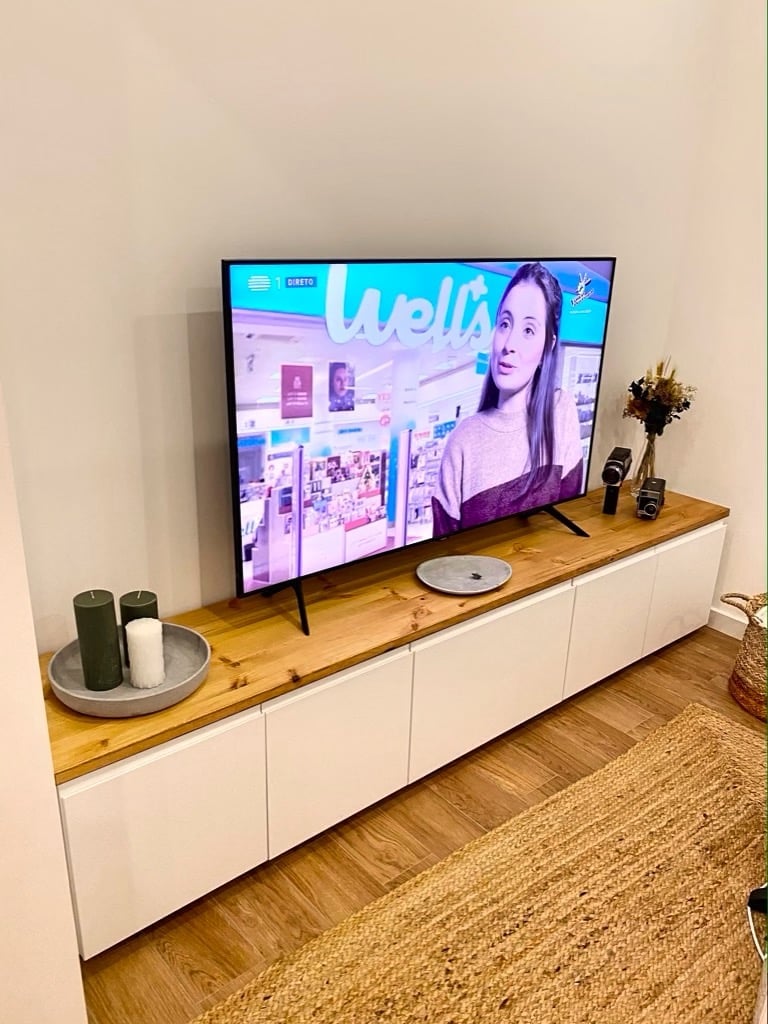
I wanted a large cabinet for my TV (it’s 55″) that wouldn’t look too IKEA-ish, and I wanted it to have a real wood top.

First, I looked at BESTÅ units, but then I realized that I couldn’t fit four 60cm modules along the wall as it is 2cm too short.

And then, once I saw the matt VOXTORP doors in a similar hack I knew METOD was the way to go.

IKEA items used:
Other materials and tools: 
  • Several pieces of pinewood
  • A worktop

TV cabinet with wood top instructions:

First, I got everything I needed and built the 3 METOD units.

pine frame

Related: I cooked up a perfect wall mounted TV cabinet


Then, I made a wood frame out of some pieces I had cut at a local store, so that it would act as a base.

metod on pine frame
pine frame below units

I wanted it to look like it was floating but the walls aren’t strong enough.

metod cabinets

I screwed everything together and to the wall and placed the doors on the units.

metod cabinet

Got a cut-to-size piece of pine at a local store. Sanded it and applied IKEA STOCKARYD wood treatment oil.

worktop

And it was done, or so I thought.

IKEA TV cabinet with wood top

I decided it would look better if the wood was darker (the original idea was to get oak, but it was 4x the price).

So I further stained it.

IKEA TV cabinet with wood top

I loved doing this. It actually only took a few hours to build it, less than I spent searching for everything. 

If you do something like this, I’d advise you to build your modules first and then measure it to get a wood top with the perfect dimensions.

~ by João Carneiro

The post Hack an IKEA TV cabinet with real wood top appeared first on IKEA Hackers.

Comments

Popular posts from this blog

SKÅDIS: 5 ways to make the IKEA pegboard even better

IKEA introduced its own pegboard system, SKÅDIS, two years ago and I’d say it’s one of the best systems IKEA launched in recent years. I love how super customisable it is, with a growing range of accessories that help keep things organized. It works everywhere, in your wardrobe to bathroom . Probably anywhere you have a flat surface to hang it up. Photo: IKEA.com SKÅDIS pegboard system See it on IKEA.com But no matter how perfect a system, you can trust IKEA hackers to improve on the SKÅDIS. And they’ve settle these 5 issues you may have faced with the handy IKEA pegboard. Read on for their fixes. 5 IKEA SKÅDIS issues and fixes #1 Expensive hooks? You’ll need quite a number of hooks and accessories to fill up the SKÅDIS pegboard, and Kenyer was shocked at how quickly they all added up. So he figured he could make his own hooks to save cost. Photo: Kenyer Over at Instructables , he shows us how to twist copper wires into the SKÅDIS hook shape. It works s...

A beautiful design idea for the IVAR cabinet with doors

A wall of IVAR cabinets with doors engraved is astonishingly captivating. Because IVAR is real solid wood (unlike a lot of flat-pack cupboards), it makes a great blank canvas for CNC machining work and engraving. IKEA items used: IKEA IVAR cabinets in 30mm (12″) and 50mm (20″) depths. IVAR cabinet | IKEA.com Other materials and tools: CNC Router How to engrave the IVAR cabinet with doors: Build a wall of IVAR cabinets to your preference. It’s not too difficult to shorten some in order to fill a wall exactly. I shortened the top row to 695mm and reduced the depth of the middle column to 40mm to create a 50/40/30 sequence so that I didn’t block the window but maximised storage capacity. Take a drawing, trace it in Inkscape or Adobe Illustrator into a black-only flat design. You can simplify the path at this point to reduce the time needed to engrave. Chop up the drawing in Inkscape or Adobe Illustrator into door-sized sections. Save as an SVG. Import the ...

Hackers Help: How to remake cam lock holes?

I want to put a 78.5” wide PAX configuration in a 77” space for a kids room . My plan is to eliminate the drawer on the right unit, then cut the shelves and rails to be 1.5” narrower. My question is, how do people attach two laminated pressboard IKEA pieces after they’ve cut off the cam lock holes? Related: See more Hackers Help questions and answers . Are they using drills bits and/or tiny hole saws to remake the cam lock holes? Or screws drilled in from the outside with wood glue? The outside pieces won’t be visible in my completed setup so I could go either way. I’m curious what other people are doing, either I haven’t seen this detail in past hacks or I haven’t been paying attention. ~ by Jenny *** Hi Jenny The best and tidiest method is to use the cut-off portion as a template to reproduce the same cam lock holes in the correct positions. The right sized drill bits and a  Forstner bit should do the trick. A Forstner bit will drill a flat-bottomed hole (...