This post is waaay overdue.
It’s almost a year since I last updated you guys on House17. All the major renovations are done but I took longer than expected to settle in and get my rhythm going.
It’s 10 months now, since I moved in. The first few nights were challenging — I hardly sleep a wink. I would be jolted from my sleep by the “noises” of the house, then I’ll strain to listen, wondering whether I’ve been broken into. Paranoid, I guess.
But it’s all good now. I’ve gotten used to the groaning of the house as it settles in for the night, not unlike the snores of a sleeping partner.
The previous post on my house was all about bathroom tiles. Click to see the “before” and plans for the master bathroom and guest bathroom.
So today, I’ll reveal the Master Bathroom Remodel! Finally.
First a brief recap of what I had to work with.
Master Bathroom remodel – before
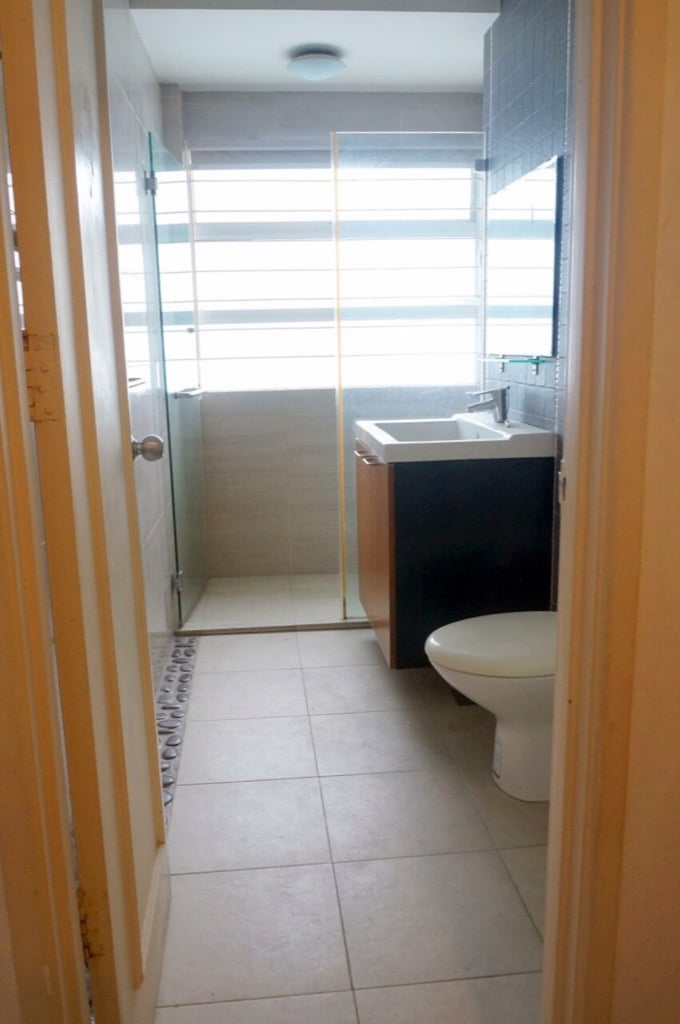
It was a long and narrow master ensuite. (Which makes it really hard to get good photos). I gutted the whole thing, because I hated the row of stones set in cement with a vengeance.
Placement wise, I swapped the toilet and sink around to make better use of the space. I reused the large basin but got rid of the hefty wooden cabinet, which was showing signs of wear and tear plus water damage.
Master Bathroom remodel – after!
The tiles were a real game changer for the bathroom. The original beige tiles were in OK condition but they were just meh. And I didn’t want to live with that blandness.
What I love were the engineered marble tiles by Feruni Ceramiche. Feruni was an excellent partner on this project and really helped turn my vision for this bathroom into reality. (Thanks, Charlotte! Couldn’t have done it without you.)
On the left wall, you’ll see the stock 2’x4′ marble slabs (picture above). On the right wall, (picture below), they cut the tiles for me to create a wall of chevrons — which is so, so good. (God bless my tiler, for patiently putting this wall up!)
I’m all heart eyes for this wall.

I liked that we used the same tile, so we could maintain the same colour tones. I did not want too much colour going on in the bathroom, which to me, is meant to be restful. And yet, because of the cut, we could add another layer of pattern to the bathroom and added so much visual interest.
Related: Make it a double sink vanity
Here’s a closer look at the chevron tile wall and sink vanity
I salvaged the sink, which I suspect is one of the older IKEA models (similar to the TÄLLEVIKEN). Instead of an undersink cabinet, I opted for a more airy, metal, wall mounted frame. My kitchen guy made a Quartz countertop to fit and set the sink on it. It works really well. And no fear of water damage or mould. (The powder-coated metal may rust eventually, but it won’t be happening anytime soon.)
Now, before the remodel, near the entrance, there was a wee spot where an old LILLÅNGEN cabinet stood. By swapping the toilet and sink, I gained that space for a longer bathroom countertop.

before – entrance wall

This photo may show the swap better. The toilet is now where the old sink vanity used to be. Moving on to the shower enclosure.
This is the sad before.

before – shower enclosure
And here’s after.
I went with the same marble in a rhombus design. It’s quite a small space. Maybe only 3.5′ in width and we’ve kept the rhombus to only this one wall. So it’s quite subtle, really. Its 3D cube effect has yet to make me dizzy, if that’s what you’re wondering. The black shower hand set really pops, don’t you think? 
And matching rain shower. Best decision I made. I totally enjoy washing my hair under this.

Scroll down for more photos of my master bathroom remodel. I tried to get a good overview shot of everything but failed. So I have to resort to more shots to show all the different angles.

Faucet with rose gold trim from a brand called Tora.


Master Bathroom Remodel Sources:
(I live in Malaysia, suppliers are local):
- Tiles – Feruni Ceramiche
- Walls – Marmo 3.0 Series (MA01)
- Floor – Cemento 2.0 Series (CT04B)
- Concealed shower mixer and shower bar set – Tora (from BigBath)
- Rain shower head – Tora (from BigBath)
- Toilet paper holder – Tora (from BigBath)
- Hand bidet – Anthill (from BigBath)
- Basin mixer – Tora (from BigBath)
- Sink – salvaged (similar to IKEA TÄLLEVIKEN)
- Metal countertop mount – custom made
- Quartz countertop – Bespoke Kitchen
- Towel rail – Lazada
- Rug – Ann Taylor (from Niki Cains Home Shop, Evolve Concept Mall)
- Mirror – IKEA Stockholm mirror
Let me know if you have questions. Happy to answer them.
Next update will be on the guest bathroom remodel. I hope it won’t take me another 10 months to write it. Over and out.
The tiles are gifted by Feruni Ceramiche but opinions are entirely my own.
The post Master Bathroom remodel: It turned out “marblellous” appeared first on IKEA Hackers.


Comments
Post a Comment