
Brighten up: A reading lamp the book lover will love

We already had a MAGNARP table lamp in the living room, but we were missing a reading lamp next to our couch.

For a standing MAGNARP floor lamp, we didn’t have space. And the available other IKEA lamps were not for our taste.

I already saw solutions with FRÄCK, so I decided to make my own wall mounted reading light, fused with MAGNARP.

Here goes:

IKEA items used:

Steps for an IKEA wall mounted reading light:

1. Take apart both sets.

2. Cut the power line of the MAGNARP to be able to pull it out from the pipe. (Cut at both ends of the switch)

3. Cut the pipe. Besides the threaded part which goes inside the bulb socket you I will need approximate 5mm.

IKEA wall mounted reading light

IKEA wall mounted reading light

IKEA wall mounted reading light

4. Cut M10 thread on the pipe’s end, and drill over the thread inside the main plate with M10 as well.

5. Bend the mirror’s fork as seen on the picture.

6. Mark the holes from the bent fork onto the main plate, and drill holes.

7. Make the electric work with a new switch. (I laced it inside the arm before doing so, but this is optional)

8. Cut out the shade for the arm. Don’t forget to reinforce it with something. (First time I missed this, and the paper was torn apart. That is why you may see some glue on the picture. I will cover it later with similar paper.)

IKEA wall mounted reading light

IKEA wall mounted reading light

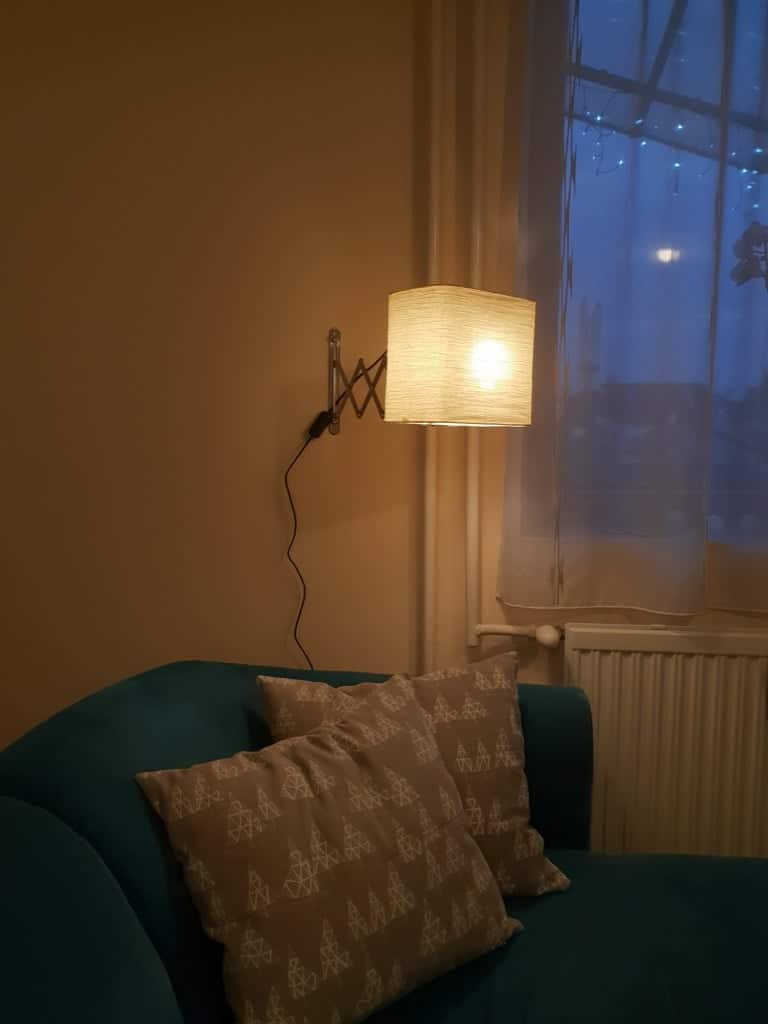
9. Assemble as seen. You will have almost no space for the tools. But it is not impossible to make 😉

~ by Bence Fazekas


You may also like these wall mounted reading light hacks

#1 Minimalist bedside reading lamps

ikea bedside wall mounted reading light

This hack took advantage of the hollow core of the LACK shelves to make a pair of Minimalist bedside reading lamps. See more.

#2 Bedside lamp and spot reading light combined

bedside reading lamp

So the pair of bedside lamps throw out fantastic mood light. But what happens when you want to read in bed? Light from wall lamps are often diffused and not directed onto a page. Now, what if we can combine a pretty wall lamp and a spot reading lamp in one? That’s just what Peter did. Merging the best of the ALANG wall light with the Jansjö LED spot light. Read more.


The post Brighten up: A reading lamp the book lover will love appeared first on IKEA Hackers.

Comments

Popular posts from this blog

SKÅDIS: 5 ways to make the IKEA pegboard even better

IKEA introduced its own pegboard system, SKÅDIS, two years ago and I’d say it’s one of the best systems IKEA launched in recent years. I love how super customisable it is, with a growing range of accessories that help keep things organized. It works everywhere, in your wardrobe to bathroom . Probably anywhere you have a flat surface to hang it up. Photo: IKEA.com SKÅDIS pegboard system See it on IKEA.com But no matter how perfect a system, you can trust IKEA hackers to improve on the SKÅDIS. And they’ve settle these 5 issues you may have faced with the handy IKEA pegboard. Read on for their fixes. 5 IKEA SKÅDIS issues and fixes #1 Expensive hooks? You’ll need quite a number of hooks and accessories to fill up the SKÅDIS pegboard, and Kenyer was shocked at how quickly they all added up. So he figured he could make his own hooks to save cost. Photo: Kenyer Over at Instructables , he shows us how to twist copper wires into the SKÅDIS hook shape. It works s...

Hackers Help: How to remake cam lock holes?

I want to put a 78.5” wide PAX configuration in a 77” space for a kids room . My plan is to eliminate the drawer on the right unit, then cut the shelves and rails to be 1.5” narrower. My question is, how do people attach two laminated pressboard IKEA pieces after they’ve cut off the cam lock holes? Related: See more Hackers Help questions and answers . Are they using drills bits and/or tiny hole saws to remake the cam lock holes? Or screws drilled in from the outside with wood glue? The outside pieces won’t be visible in my completed setup so I could go either way. I’m curious what other people are doing, either I haven’t seen this detail in past hacks or I haven’t been paying attention. ~ by Jenny *** Hi Jenny The best and tidiest method is to use the cut-off portion as a template to reproduce the same cam lock holes in the correct positions. The right sized drill bits and a  Forstner bit should do the trick. A Forstner bit will drill a flat-bottomed hole (...

A beautiful design idea for the IVAR cabinet with doors

A wall of IVAR cabinets with doors engraved is astonishingly captivating. Because IVAR is real solid wood (unlike a lot of flat-pack cupboards), it makes a great blank canvas for CNC machining work and engraving. IKEA items used: IKEA IVAR cabinets in 30mm (12″) and 50mm (20″) depths. IVAR cabinet | IKEA.com Other materials and tools: CNC Router How to engrave the IVAR cabinet with doors: Build a wall of IVAR cabinets to your preference. It’s not too difficult to shorten some in order to fill a wall exactly. I shortened the top row to 695mm and reduced the depth of the middle column to 40mm to create a 50/40/30 sequence so that I didn’t block the window but maximised storage capacity. Take a drawing, trace it in Inkscape or Adobe Illustrator into a black-only flat design. You can simplify the path at this point to reduce the time needed to engrave. Chop up the drawing in Inkscape or Adobe Illustrator into door-sized sections. Save as an SVG. Import the ...