
Easy tweak for a new dining buffet with hutch

I turned an old IKEA LEKSVIK cabinet into a dining buffet with hutch.

IKEA item used:
  • LEKSVIK glass door cabinet. (Some items in the LEKSVIK range are still available, but this particular cabinet model does not seem to be in production anymore.)
IKEA LEKSVIK

IKEA LEKSVIK – before

Other materials:

Instructions for dining buffet with hutch

To make my dining buffet with hutch, all I need to do was to apply a simple coat of flat black paint to make it match my dining room furniture. I painted the inside of the glass cabinet too.

Then I nailed on a birch backing, cut to size, to fill the cavity between the lower cabinet and upper glass cabinet. I painted the birch backing board in the same colour as well.

Easy tweak for a new dining buffet with hutch

It looks fabulous and is a great fit in my dining room.

Easy tweak for a new dining buffet with hutch

~ by Jeff


You may also like these dining cabinet hacks

#1 Tall and elegant glass dining cabinet

dining cabinet

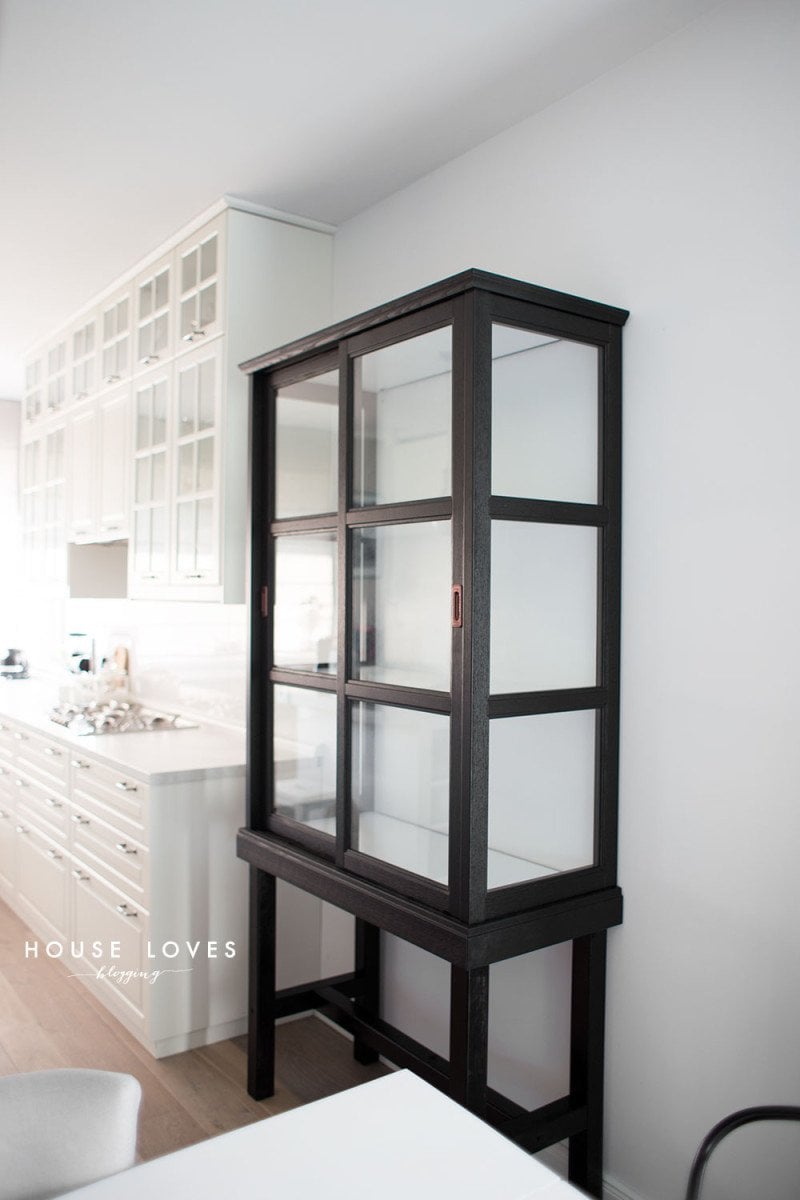
The empty wall between the kitchen and dining area was very disturbing, even screaming at me to fill it with something. I came up with a hack on the IKEA MALSJO cabinet turning it into a tall glass cabinet.

#2 BILLY China Cabinet

IKEA BILLY china cabinet

I wanted to share my China Cabinet hack that I recently installed. I had been searching for a couple of years for the perfect china cabinet for my breakfast nook. I wanted it to be tall, approximately 60 inches wide, and no more than 15 inches deep.

Glass doors on top and closed storage on the bottom. Also needed integrated lighting and glass shelves. Nothing I found had all of the requirements I needed, so I decided to hack my own. BILLY was exactly what I needed! See the IKEA BILLY China Cabinet hack.

#3 Dining room sideboard from the HEMNES

dining room sideboard

We took our unused large, black HEMNES dresser and repurposed it into a dining room sideboard. First we removed the four large drawers and their drawer slides. The holes were filled and sanded and the entire base was painted with two coats of white paint. See the rest of the tutorial.


The post Easy tweak for a new dining buffet with hutch appeared first on IKEA Hackers.

Comments

Popular posts from this blog

SKÅDIS: 5 ways to make the IKEA pegboard even better

IKEA introduced its own pegboard system, SKÅDIS, two years ago and I’d say it’s one of the best systems IKEA launched in recent years. I love how super customisable it is, with a growing range of accessories that help keep things organized. It works everywhere, in your wardrobe to bathroom . Probably anywhere you have a flat surface to hang it up. Photo: IKEA.com SKÅDIS pegboard system See it on IKEA.com But no matter how perfect a system, you can trust IKEA hackers to improve on the SKÅDIS. And they’ve settle these 5 issues you may have faced with the handy IKEA pegboard. Read on for their fixes. 5 IKEA SKÅDIS issues and fixes #1 Expensive hooks? You’ll need quite a number of hooks and accessories to fill up the SKÅDIS pegboard, and Kenyer was shocked at how quickly they all added up. So he figured he could make his own hooks to save cost. Photo: Kenyer Over at Instructables , he shows us how to twist copper wires into the SKÅDIS hook shape. It works s...

KALLAX desk ideas: Three ways to set up a workstation

Three great ideas for a KALLAX desk . #1 Compact, minimalist desk for laptop I put together a KALLAX desk for my laptop for just under 25 euros. Just a KALLAX 2×2 is needed. No other materials required. IKEA item used: KALLAX 2 x 2 (77 x 77 cm) KALLAX 2×2 | IKEA.com All you need to do is assemble 3 of the pieces in a U shape. That is all.  If you want to strengthen the structure you would need to drill a couple of holes in order to use the long middle shelf of the KALLAX unit as a back reinforcer. Easy and it works. ~ by Fabio Tudela #2 KALLAX standing desk I choose to stand at work because it makes me feel infinitely more productive. Our department recently moved into a new building and we had the opportunity to design our own spaces. Items Used: VIKA AMON / TORNLIDEN table top x 2 (discontinued, replaced by LINNMON ) KALLAX 4 cube x 2 KALLAX drawer unit x 2 8 – 3″ locking casters / wheels 1 – 6′ zinc brace I had a few VIKA AMON tables ...

Amped up KURA bed with drawers and safety rail

We saw other KURA beds with storage drawers underneath on this site. So, we also wanted the same — to make space for LEGO s and wooden trains under the bed. We installed the additional headboard panels because the configuration of the room and the location of the windows in the room meant that we wanted the children’s heads on the right and the ladder on the left. The KURA plans did not seem to allow this configuration, though I have seen online that there are models of this bed from 2003 that allowed more options for setup. Additional safety features Safety rail panel for the lower KURA bed helps our two year old feel secure, as he just transitioned from a crib directly to this bunk. Likewise metal handles on the ladder. They added a lot of confidence for both the five-year-old and the two-year-old when climbing up to the top bunk. We are aware that the bunk is now even higher than before and both children are under 6. Use caution and common sense before making these modifi...