It’s been a while since I did a home tour. If you’ve missed the previous reveals, you can catch up with my Master Bathroom remodel and Guest Bathroom reveal. Today, let’s focus on my kitchen renovation.
Hands down, this is the most used room in my home. I spend crazy amounts of time in here, even when I’m not cooking.
Just off to the side of the kitchen I converted an awkward space into a reading nook. In the mornings, I sit and read or pray and meditate, before it gets too warm.
And on the other side, there’s a work-in-progress plant wall / indoor garden which also takes up a lot of my time.
So, all in all, lots of traffic in here, and that’s not even counting cooking and eating time.
The kitchen is definitely my favourite room, because the transformation is huge and I love how it turned out.
Kitchen renovation: The before
House 17 when I first got it, actually had 2 kitchens, which is a very common “Asian” home concept. First, the “dry kitchen”, which is where you make simple things like drinks, a sandwich or slice up fruits. And then the “wet kitchen”, where the real action happens.
This is the view from the old dining area, looking towards the dry kitchen with bar table (along left wall) and wet kitchen beyond the archway.

On entering the wet kitchen. On the left, a door that leads to the yard.

Turn right and you’ll see the cooking area.

And next to the hob, some cabinets and a short length of wall. The strange aquarium tank like glass pane peers into what would eventually be my indoor garden.

On the other side (facing the cooking area), is the door that opens up to the yard. You see a peek of the dry kitchen to the left of the wall, where you first entered.
And that completes a 360 degree tour of the old kitchen.

The plan of action
I didn’t like the layout and did not have the need for 2 kitchens.
So I got cracking and revamped it totally. Sorry for the tiny floor plan photo but that’s the only one I have.

kitchen renovation plans
I removed the dry kitchen entirely and made that my dining area (labelled in red). It made more sense than eating next to the staircase.
And then, the blue circles were walls I (which means my contractors) took down. The dividing wall and door to the yard were completely removed and replaced with sliding doors (from the left wall towards Bath 3), so I could still close up the kitchen area should I need to do some wild wokking.
And the red line up on the top left is where I added a wall to close the area up and create my reading spot.
Where the old stove was I opened it up and added another pair of sliding doors leading out to my indoor garden. And beyond that, a door to the yard and laundry area. A lot of doors! Yes.
I did not keep any of the old kitchen cabinets as the veneer was peeling and the insides mucky from oil stains.
And now, the kitchen renovation reveal
This is how the kitchen renovation plans in my head turned out.
Take a look these side by side comparisons.
Let’s again start from the entrance. This is the view from the new dining area, looking toward the kitchen. Dry kitchen is gone. Took out the ceiling fan and replaced it with a modern chandelier.
Taking down the wall was the best decision ever. The space feels so much larger.

Yes, the wall and door to the yard is completely gone and in its place, a small peninsula and 2 vintage-style copper and glass pendant lights. (I wished I could take down the notch on the top right but alas, it’s a supporting beam.)
And we salvaged the wood from the doors and made it into a bench.

The photo on the left (below) was the yard in its former life. It was an outdoor area which I thought was wasted as broom and mop storage zone.
Now it’s my reading nook. I sealed the opening above the wood slats with polycarbonate roofing. I would have loved to install a glass skylight but it was beyond my budget.
Also added louvred windows in front of the wood slats on the wall.

See the wood slats on the left wall? I moved them to the right wall, so I can take photos of me smiling at nothing. 

Feature wall and backsplash
Now onto the wall with the sink. I kept the position of the window but enlarged it a wee bit to centralize the sink and changed it from 3 panels to 2.
Then, we ripped out the beige mosaic tiles and put up these gorgeous rhombus tiles from Feruni Ceramiche.

Originally, I had not planned on tiling the kitchen wall. I wanted to paint it and install a glass backsplash for the stove area. But when I visited Feruni’s showroom, I was smitten with their tiles and 2 bathrooms were not enough to explore their designs.
The tile is from the I-Rhombus Series in white and medium grey grout.
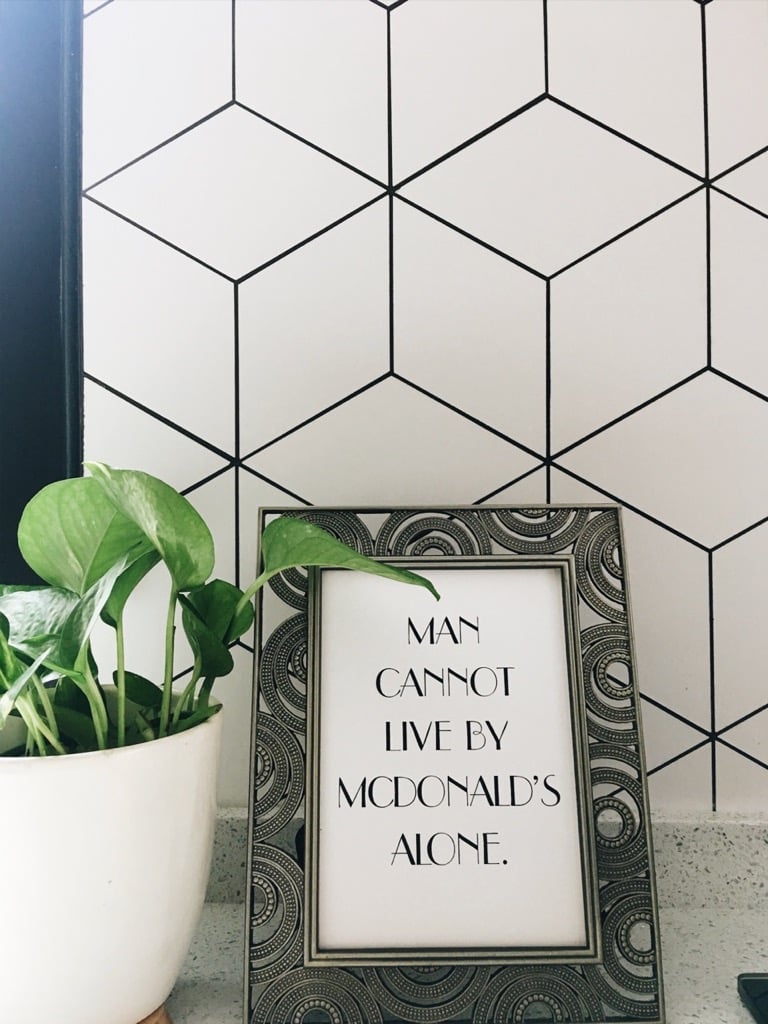
I can’t say enough good things nor count the number of compliments I’ve received about it. I’ve also not had any issues wiping oil or food splashes off the tiles either. They are working beautifully for me. And one year on, they still look as good as new.

I added two pull out wire baskets under the hob for all my pots and pans. Sadly, all the kitchen cabinets and accessories are not from the IKEA kitchen range.

I would have loved to used the METOD again, but this custom kitchen company actually worked out cheaper than IKEA. So, the pocket rules.
Appliance high cabinets
The wall opposite the window is a shorter one. Here I went with ceiling height cabinets to house my black Samsung fridge and oven.
Beside that, I squeezed in a small counter space as a spot to lay down hot dishes from the oven. It also serves as a coffee station and place for my slow cooker.

Indoor garden and living wall
As mentioned, the wall where the stove used to be now leads to the indoor garden and access to the yard. The vertical garden is still sparse and struggling. (Its goal is to teach me patience!)

Here’s a larger photo.

And that’s how it all came together.
Since the photos were taken, I’ve added some shelving on this wall behind the peninsula.

There are still little things to add like art and pictures. And I still haven’t found the perfect runner. Any recommendations?
The kitchen renovation is done but styling will always remain a work in progress.
So far, I really love cooking in here. And guests also love hanging out with me in the kitchen.
And to end this kitchen tour, a few more pics for the road.


Continue on to other parts of my home:
- Master Bathroom
- Guest Bathroom
- Renovation plans and progress
- Renovation diary – before
- Kitchen Reveal (IKEA METOD makeover) in my old condo
Sources:
- Tiles – Feruni Ceramiche (I-Rhombus)
- Hob and Hood – Robam
- Kitchen Cabinets – Bespoke Kitchen Sdn Bhd
- Dining Room chandelier – Mr. Bright Lighting (Similar on Amazon)
- Hanging pendant lights – Wong Lighting (Similar on Amazon)
- Fridge – Samsung
- Fan – Elmark
Let me know if you have any questions. Always happy to help.
The tiles are gifted by Feruni Ceramiche but opinions are entirely my own.
The post Kitchen renovation reveal: Rhombus wall steals the show appeared first on IKEA Hackers.


Comments
Post a Comment