
Built-in Home Bar Cabinet with IKEA BILLY

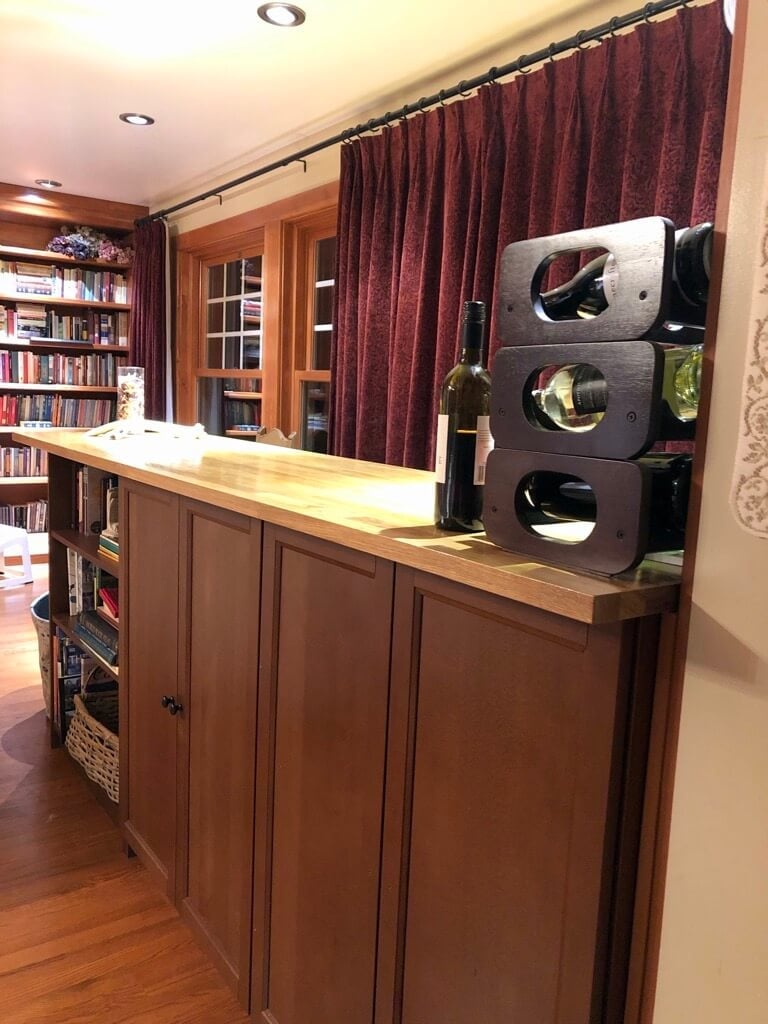
I wanted to create a place to house all the wires and components of a home theatre. And I wanted to create a home bar cabinet to store wine glasses, etc.

We already owned the BILLY bookcases and they looked great in the room they were in. It took about five hours to build our BILLY home bar cabinet. The bookcases were already assembled, which shaved off our build time considerably.

It would cost about $650 if we had purchased everything new. Pay special attention to making sure everything is level before screwing it together.

Making the BILLY bookcases into a home bar cabinet is a fabulous idea. We love how it turned out!

IKEA items used:
  • Six BILLY bookshelves (41.5” height)
  • One nine foot pre-finished IKEA kitchen wood countertop
Other materials:

Steps for our DIY home bar cabinet

1. We took six already assembled BILLY bookshelves that we owned and moved them into a living room area where we set put three of the shelves along the front section, and the three other shelves back to back with the first set.

2. We assembled the shelves in this arrangement loosely first, prior to screwing them to the floor and the shelves’ sides together.

Home Bar Cabinet IKEA BILLY hack


Related: Man Cave Bar


Home Bar Cabinet IKEA BILLY hack

3. We removed the back panel from the first set of shelves, nearest the wall, to house several home theatre components and the wires to a home theatre.

Home Bar Cabinet IKEA BILLY hack

Home Bar Cabinet IKEA BILLY hack

4. When the shelves were levelled, we secured the first set to the wall, with a board between the wall and the first shelf for a solid background for the screws to go into, instead of drywall.

5. The shelves were then bracketed and screwed together.

Home Bar Cabinet IKEA BILLY hack Home Bar Cabinet IKEA BILLY hack Home Bar Cabinet IKEA BILLY hack

6. Next, we placed the wood countertop on the top of the six bookshelves. Then screwed into place from the underside of the top panel of the bookshelf into the wood of the countertop.

Home Bar Cabinet IKEA BILLY hack Home Bar Cabinet IKEA BILLY hack

7. Small decorative brackets were added for further stability and aesthetics to the end of the bar top.

Home Bar Cabinet IKEA BILLY hack Home Bar Cabinet IKEA BILLY hack Home Bar Cabinet IKEA BILLY hack

8. Lastly, we finished the bar top with a water based Varathane. Five coats on top and edges, with a light sanding in between each coat

~ by Bonnie Landry


You may also like these IKEA Bar hacks


The post Built-in Home Bar Cabinet with IKEA BILLY appeared first on IKEA Hackers.

Comments

Popular posts from this blog

SKÅDIS: 5 ways to make the IKEA pegboard even better

IKEA introduced its own pegboard system, SKÅDIS, two years ago and I’d say it’s one of the best systems IKEA launched in recent years. I love how super customisable it is, with a growing range of accessories that help keep things organized. It works everywhere, in your wardrobe to bathroom . Probably anywhere you have a flat surface to hang it up. Photo: IKEA.com SKÅDIS pegboard system See it on IKEA.com But no matter how perfect a system, you can trust IKEA hackers to improve on the SKÅDIS. And they’ve settle these 5 issues you may have faced with the handy IKEA pegboard. Read on for their fixes. 5 IKEA SKÅDIS issues and fixes #1 Expensive hooks? You’ll need quite a number of hooks and accessories to fill up the SKÅDIS pegboard, and Kenyer was shocked at how quickly they all added up. So he figured he could make his own hooks to save cost. Photo: Kenyer Over at Instructables , he shows us how to twist copper wires into the SKÅDIS hook shape. It works s...

Enjoy Sweet Dreams With These DIY Headboard Ideas

A headboard is one of the last things you see before you fall asleep and one of the first things you see when you wake up. Demonstrate your unique design style by creating your own. Below are some ideas and tips to get you started. Do you think the formula for sleep is on this London bedroom’s headboard? Image: Clifton Interiors Ltd Chalk headboard Create this look with a can of black chalkboard paint. Almost any type of wall – drywall, plaster, wood, brick or concrete – will work, as long is it is properly prepped. Chalkboard paint is easy to apply, dries fast and can be cleaned with soap and water. But you’re not limited to the color black – chalkboard paint comes in just about every color. If you don’t want to use paint, consider chalkboard contact paper – and yes, you can use chalk on it. An Edmonton hockey-themed room. Image: Cameron Homes Hockey goal headboard For the ultimate hockey fan, nothing beats a hockey goal headboard. Complete the scene with a team blank...

A beautiful design idea for the IVAR cabinet with doors

A wall of IVAR cabinets with doors engraved is astonishingly captivating. Because IVAR is real solid wood (unlike a lot of flat-pack cupboards), it makes a great blank canvas for CNC machining work and engraving. IKEA items used: IKEA IVAR cabinets in 30mm (12″) and 50mm (20″) depths. IVAR cabinet | IKEA.com Other materials and tools: CNC Router How to engrave the IVAR cabinet with doors: Build a wall of IVAR cabinets to your preference. It’s not too difficult to shorten some in order to fill a wall exactly. I shortened the top row to 695mm and reduced the depth of the middle column to 40mm to create a 50/40/30 sequence so that I didn’t block the window but maximised storage capacity. Take a drawing, trace it in Inkscape or Adobe Illustrator into a black-only flat design. You can simplify the path at this point to reduce the time needed to engrave. Chop up the drawing in Inkscape or Adobe Illustrator into door-sized sections. Save as an SVG. Import the ...