
Multi-device charging station built into an IKEA bench

We made a multi-device charging station dock for our laptop and tablet.

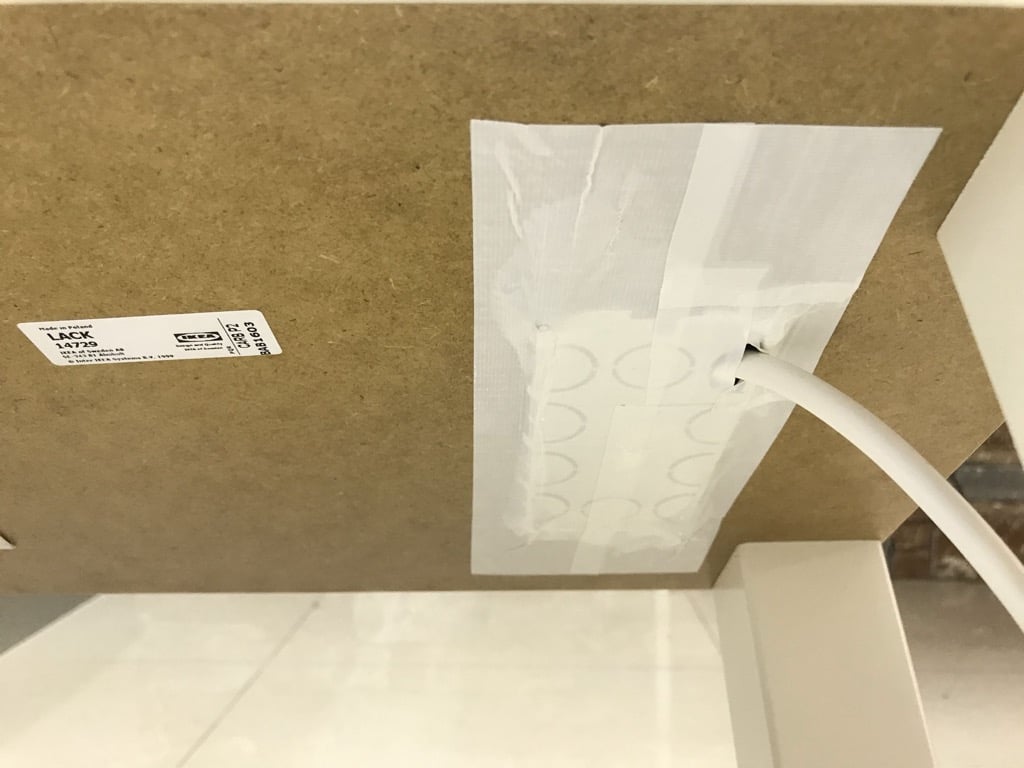
For our project, we used the very inexpensive IKEA LACK TV bench, which costs only $15.99.

It was also our object of choice because:

You can cut holes into it.

Easily.

The docking station tucks neatly away beside our sofa and is easily accessible.

IKEA items used:
LACK TV bench

LACK TV bench | IKEA.com

Materials and tools:
  • Electrical socket outlet (I used the “Gewiss Chorus” Flush Socket Outlet)
  • Electrical cable
  • Drill
  • Electric saw
  • Plastic wall corner guards/protectors
  • Glue
  • Foam or another soft sheet material

Hack instructions for DIY multi-device charging station:

Outline the slots for the socket outlet, and for the electronic devices (Tablet/Laptop).

DIY multi-device charging station - IKEA hack

Drill a hole in each of the corners of the outlined slots (these holes will be used as an entry point for the electric saw).

DIY multi-device charging station - IKEA hack

Cut out the outlined slots using the electric saw.

Wire the electrical cable to the socket outlet.

DIY multi-device charging station - IKEA hack

DIY multi-device charging station - IKEA hack

Cover the rough sides of the cut-out slots using the plastic corner guards; Cut out a frame (similar to the shape of a picture frame) from the plastic corner guards; Use glue to attach them to the TV bench.

Measure the height of your electric devices, allow the shortest device to extend about 6-8cm (3 inches) from the top of the table.

Remove the bottom shelf of the TV bench; measure and mark the new height and reinstall the shelf.

DIY multi-device charging station - IKEA hack

Cover the shelf using the foam (the electric devices will rest on this foam).

Multi-device charging station done!

DIY multi-device charging station - IKEA hack

DIY multi-device charging station - IKEA hack

The station is not visible from the main areas of our living room.

DIY multi-device charging station - IKEA hack

Quietly filling up our devices with juice in the corner.

DIY multi-device charging station - IKEA hack

DIY multi-device charging station - IKEA hack

More info:

If you have access to a 3d printer – then you should print the cover frame for the slots – this will save you tons of time cutting them accurately from plastic corner guards.

DIY multi-device charging station - IKEA hack

Since this project involves electricity, please make sure you know what you are doing; if in doubt – use a professional to wire the outlet socket.

~ by Alon

The post Multi-device charging station built into an IKEA bench appeared first on IKEA Hackers.

Comments

Popular posts from this blog

SKÅDIS: 5 ways to make the IKEA pegboard even better

IKEA introduced its own pegboard system, SKÅDIS, two years ago and I’d say it’s one of the best systems IKEA launched in recent years. I love how super customisable it is, with a growing range of accessories that help keep things organized. It works everywhere, in your wardrobe to bathroom . Probably anywhere you have a flat surface to hang it up. Photo: IKEA.com SKÅDIS pegboard system See it on IKEA.com But no matter how perfect a system, you can trust IKEA hackers to improve on the SKÅDIS. And they’ve settle these 5 issues you may have faced with the handy IKEA pegboard. Read on for their fixes. 5 IKEA SKÅDIS issues and fixes #1 Expensive hooks? You’ll need quite a number of hooks and accessories to fill up the SKÅDIS pegboard, and Kenyer was shocked at how quickly they all added up. So he figured he could make his own hooks to save cost. Photo: Kenyer Over at Instructables , he shows us how to twist copper wires into the SKÅDIS hook shape. It works s...

Enjoy Sweet Dreams With These DIY Headboard Ideas

A headboard is one of the last things you see before you fall asleep and one of the first things you see when you wake up. Demonstrate your unique design style by creating your own. Below are some ideas and tips to get you started. Do you think the formula for sleep is on this London bedroom’s headboard? Image: Clifton Interiors Ltd Chalk headboard Create this look with a can of black chalkboard paint. Almost any type of wall – drywall, plaster, wood, brick or concrete – will work, as long is it is properly prepped. Chalkboard paint is easy to apply, dries fast and can be cleaned with soap and water. But you’re not limited to the color black – chalkboard paint comes in just about every color. If you don’t want to use paint, consider chalkboard contact paper – and yes, you can use chalk on it. An Edmonton hockey-themed room. Image: Cameron Homes Hockey goal headboard For the ultimate hockey fan, nothing beats a hockey goal headboard. Complete the scene with a team blank...

A beautiful design idea for the IVAR cabinet with doors

A wall of IVAR cabinets with doors engraved is astonishingly captivating. Because IVAR is real solid wood (unlike a lot of flat-pack cupboards), it makes a great blank canvas for CNC machining work and engraving. IKEA items used: IKEA IVAR cabinets in 30mm (12″) and 50mm (20″) depths. IVAR cabinet | IKEA.com Other materials and tools: CNC Router How to engrave the IVAR cabinet with doors: Build a wall of IVAR cabinets to your preference. It’s not too difficult to shorten some in order to fill a wall exactly. I shortened the top row to 695mm and reduced the depth of the middle column to 40mm to create a 50/40/30 sequence so that I didn’t block the window but maximised storage capacity. Take a drawing, trace it in Inkscape or Adobe Illustrator into a black-only flat design. You can simplify the path at this point to reduce the time needed to engrave. Chop up the drawing in Inkscape or Adobe Illustrator into door-sized sections. Save as an SVG. Import the ...